Showing posts with label DIY. Show all posts

Monday, June 20, 2011

Less than a week to go!

Sorry I've been MIA!  I've been in the last stretch of planning the wedding.

Want to see what I've been up to lately?


I made all of our escort cards!
I had paper left over from our invitations so it didn't cost me extra money to make them so that was a bonus.  I used the paisley patterned paper in cotton candy and cotton candy card stock from Cards and Pockets.  I cut the paisley patterned paper in half height-wise.  Then, I cut 2"x3" rectangles out of the cotton candy card stock.  I made each name and table assignment in Photoshop.  I printed them on white card stock and cut them out (1.5"x2.5").  I used double sided tape to adhere everything together.

I finally decided on my DIY centerpieces for the reception!  
I put real light pink rose petals in water, followed by a floating candle in each hurricane.


I made our layered ceremony programs!
I got the idea from a friend of mine that did layered wedding programs for her wedding.
I designed them in Photoshop and had them printed and cut at FedEx Office.  I used metallic cotton candy card stock from Cards and Pockets for the backing, folded it over on the front, 2-hole punched it, and tied it together with green ribbon.  My awesome Maid of Honor, Natalie, stayed up until 3AM to help me assemble them.


I made our dinner menus!


I made our beverage menus! 


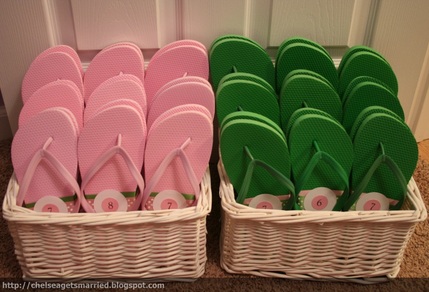
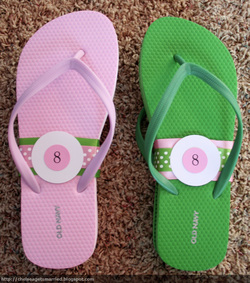
I made our flip flop basket sign!


I made our cocktail hour centerpieces and decorations.  They're ranunculus luminaries. 


I also changed my mind about the pomanders for the aisle decorations.  Now they're pink peony pomanders.  They look just like the pink peony topiaries, but in pomander form.  
I haven't gotten around to taking photos yet, but I will.

I have some miscellaneous things to do this week to wrap everything up.  
I took most of the week off of work so I wouldn't be as stressed out. 

Brad and I took two dance lessons last week.  It was a lot of fun!  We decided to have one more lesson tonight.  Now we just have to practice this week!  We're not planning anything fancy.  We just don't want to look like two eighth graders turning around in a circle for our first dance.

5 days to go!

Thursday, May 5, 2011

Centerpieces-- Help me decide! Part II

Wow!  Thanks for all the feedback on the centerpieces!

I forgot about the other option.  So here's option #4...

Wednesday, May 4, 2011

Centerpieces-- Help me decide!

Yes, 52 days until my wedding {AHH! cue panic attack}, and I haven't decided what half of my reception centerpieces will be.  Oh, and they're DIY.

I know.  I'm ridiculous.

Ok, here are the choices!
Option #1
Pretend that I didn't run out of ribbon on the one and the ribbon is straight and pretty.

Option #2

Option #3
There is one votive candle inside each hurricane.

Don't worry, you can talk over these hurricanes.  My maid of honor, Natalie, and I have practiced.

Prepare yourself, I'm about to go into crazy detail about what our reception space 
will look like to fully inform you for your decision.

This is our reception space.

We'll be using round tables with white table linens.  We'll also have white chair covers 
and pink chair sashes.  Here's a not-so-great photo of one of the chairs 
{obviously with the cover and sash just taken out of the bag}.

Above the dance floor, which is in the middle of the room, we'll be hanging 30 pink, green, and white paper lanterns in varying sizes that we'll light up with battery-operated lights 
{like pictured above}.

The other half of the centerpieces will be floral arrangements that look like this, 
sans the petals and add votive candles.

Ok, so which one should I go with?

Bonus point: Can you guess which one would be the most budget-friendly to go with?

Friday, April 8, 2011

Flower Girl Basket

Whew!  I feel like I'm in a wedding whirlwind right now.  
I had my second dress fitting this afternoon!  I love my dress!  
But I still need to find a bustier and earrings to go with it. I decided that I'm not 
going to wear a necklace.

Last night I checked one more thing off my to-do list-- the flower girl basket!


I bought the pre-made basket at Hobby Lobby for $12 {with a 40% off coupon, of course}.


Then, I took the weird, ugly knot-bows off of it.  I just pulled them off-- nothing fancy.


This is where my lack of photos comes in.  I made a bow with 2 inch white, satin ribbon and glued it to the basket with hot glue.  Then, I took the silk pink peony, glued the rhinestone button to the center, and glued it on top of the bow.  Pretty simple and for less than $20!


Moss Covered Initials & Ampersand


Sorry for my lack of posts lately.  I've been in a mad dash to get our DIY invitations done 
{and the 10,000 other things on my wedding to-do list done}.

Here's the direct links to the moss covered letter tutorial and the mossy ampersand tutorial.

Let me know if you make these!  I'd love to see yours!

Sunday, March 27, 2011

Moss Covered Initials & Ampersand


I finished our moss covered initials and ampersand this weekend!

I'll be sharing the tutorial at lovely little details this Thursday!

lovely little details {blog}

Sunday, March 20, 2011

Ring Bearer Pillow & Garters


My parents came into town this weekend. My mom and I ran around getting fabric, ribbon, lace, flowers, and all sorts of goodies to make my ring bearer pillow and garters. Then we got to work.


My mom sewed the 8 inch by 8 inch pillow.
It was pretty basic, only we added the 2 inch pink, satin ribbon and 1 inch white, satin ribbon on the front of the pillow. We also added 2 inches of white ribbon on the backside of the pillow for the ring bearer to hold onto {keep that in mind!}. I attached the two ribbons and rhinestone button to the pink peony with hot glue. Then I attached the pink peony to the pillow with hot glue.

My mom also sewed the garters.


For my "something blue" and lace keepsake garter, she used 2 inch antique white satin ribbon, lace, 3/8 inch light blue satin ribbon, and 3/8 inch elastic.

I love it! And, it was so much cheaper than my $78 inspiration garter!


For my university-themed toss garter, she used 1.5 inch white grosgrain ribbon, 3/8 inch red satin ribbon, and 3/8 inch elastic. I love this one, too! I'll slip it in before the garter toss. Like the keepsake garter, it was much cheaper than the $58 inspiration garter!

Sunday, February 13, 2011

Flip Flop Basket

Picture

I decided to have a flip flop basket at our wedding reception after a friend of mine had one at her reception. Those flip flops saved my poor, aching feet when I wanted to get my dance on. {I had worn my super-cute-but-uncomfortable-after-wearing-for-more-than-3-hours lace heels.}

I purchased 18 pairs of flip flops (9 pink and 9 green) from Old Navy.
I splurged a little on Old Navy flip flops because the flip flops I wore at my friend's wedding were the $1 craft flip flops, and after dancing in them for a few hours they started to break and I had to put my heels back on. :(

Here is the breakdown of the sizes I purchased (we plan on having ~125 wedding guests):
Size 11: 1
Size 10: 2
Size 9: 3
Size 8: 7
Size 7: 4
Size 6: 1


Picture


DIRECTIONS:
I placed each pair back to back. To secure them while I put the ribbon on I used 2 rubber bands (1 on the top, 1 on the bottom). I wrapped the thicker ribbon around the flip flops and secured it in the front with double sided tape. Then I wrapped the thinner polka dotted ribbon around and secured it in the front with double sided tape. I placed the size circles on top to cover up where the ends met. I used a 2" circular punch for the larger circle. I printed the sizes on scrapbook paper and punched them out with a 1" circular punch. I used double sided tape to secure the 1" circle to the 2" circle and the 2" circle to the ribbon
.

Thursday, February 3, 2011

Invitation Mock-Up

I didn't want to DIY my invitations. Seriously. I didn't. I didn't even know where to start. But after looking at what seemed like a million invitations, I couldn't find anything I liked for the price I wanted to pay. Classic conundrum.

{FYI: My budget is $3.00 per invitation suite.}

I saw a bunch of girls posting about Cards and Pockets on TK, so I thought I would check them out. While browsing photos on their facebook page I came across this invitation suite.
I loved the paisley patterned paper!

I decided to order some samples from them to see if I liked everything. I ordered the Signature PocketFold Mock-Up Kit {$10.50}, Panel Card Mock-Up Kit {$5.00}, One Custom Pattern Sample in Candy Pink Paisley Floral {$3.99}, and One Custom Pattern Sample in Candy Pink Swirl {$3.99}. They have free shipping on samples.

I ordered 2 different types of green paper-- matte {medina green} and metallic {fairway} and only one type of pink paper-- matte {candy pink}. I decided to go with the metallic green pocket folder.

I decided that a pocket folder would be best since 95% of our guests will be traveling from out-of-town. I thought that a pocket folder would help them keep all of the information together.

I designed everything in Photoshop Illustrator and Photoshop.

The script font is "Feel Script" and the sans serif font is "Print Clearly".

So how much are these bad boys going to cost?

Well, I broke down the costs and looked into other paper suppliers. I discovered that 100 metallic fairway pocket folders at Cards and Pockets costs $110. However, they cost only $83.98 at Paper and More. So I plan on getting the pocket folders at Paper and More. Everything else will come from Cards and Pockets.

According to my calculations, each invitation {not including postage} will cost around $2.00.
Woohoo, under budget!

I'm trying to get the invitation and inserts fit onto one 8.5" x 11" page. Then, I'll have them printed at FedEx Office on the card stock that I purchase. They charge $.09 per black and white print. They charge $1.49 per cut, but they can cut up to 100 pages at a time. {FYI: They charge $.63 per color print, which is what I'll be doing for our table name cards.}


Now, the fun/interesting/stressful part will be assembling all of these!

Any volunteers?

:)

Saturday, January 15, 2011

Be Mine Frame


In the middle of my wedding planning madness I took, literally, a couple minutes to put together this Valentine frame.

All you need is:
  • a frame
  • scrapbook paper
  • Scrabble tiles
  • glue dots
I cut the scrapbook paper to size and inserted it into the frame. Then I used the glue dots to secure the Scrabble tiles on top of the glass.


Monday, January 10, 2011

Crepe Paper Streamer Distress


I went to W*lmart the other day to restock my crepe paper streamer supply for my crepe paper rose pomanders. To my disbelief, my color has been discontinued and there was only one "classic pink" roll on the shelf. It was over-crowded by the new color-- "rose petal". Blah!

I called over 8 W*lmarts (in 5 different cities/towns). No dice. I had to explain what crepe paper was to many of the associates I spoke to. No, it's not like construction paper. No, it's not like tissue paper. Oy.

I ended up going to a W*lmart and finding 8 rolls. My mom went to a W*lmart near my hometown and found 4 rolls. But I still want more just in case. I still have 4 more pomanders to make and 20+ miniature pomanders for our tall centerpieces.

So if you're at W*lmart and see some B*st Occasions "classic pink" crepe paper streamers let me know!

Thursday, December 16, 2010

Photo Booth Props-- Round 1


I really enjoyed making these props for our DIY photo booth. I'm working on making more, but this is what I've done so far.

They are very inexpensive to make-- all you need is some card stock, felt, dowel rods, scissors, and a glue gun!


If you would like any of the templates to make these feel free to contact me!

I printed the templates onto card stock, cut the shapes out, hot glued the shapes to felt, cut the shapes out of the felt, and glued the dowel rod onto the card stock. I hope that makes sense!


I recently went to Chicago to visit my amazing Maid of Honor and nanny-extraordinaire, Natalie. The beautiful girls that she nannies wanted to create their own props, so I brought my supplies and we crafted-it-up! :)

Tall Centerpiece Mock-Up


I made a mock up of my possible tall centerpiece.

Here's the details: manzanita branch with 4 miniature crepe paper rose pomanders (made with Christmas ornaments I wasn't using) and 4 crystal/pearl hangy things I made in a terra cotta pot (I would paint it brown though, so picture it brown) with moss.

It's 26-27 inches, but I think with some more finagling I can add a few more inches.


Thoughts? Suggestions? Please be honest! :)


Monday, October 18, 2010

You say flower balls, I say pomanders.


I call them pomanders. I don't like the term "flower balls". They look too pretty to be called "balls". Anyway, I finished my first crepe paper pomander. I'm using them as aisle decorations.

The directions on how to make them can be found here:
http://houseofsmiths.blogspot.com/2010/02/hanging-roses-i-was-browsing-blogs.html. (I ♥ this blog!)

Here is a video of Shelley from House of Smiths demonstrating how to make the crepe paper roses: http://houseofsmiths.blogspot.com/p/press.html

I used a 5 inch white Styrofoam ball form and light pink crepe paper from W*lmart ($1.25 each). The key is to use a 40% or 50% off coupon to buy the Styrofoam balls-- they're pricey. They come out to be about $2.50 with the coupons.

Jack wanted his picture taken with the pomander.

Now, I just need to decide what color of ribbon to use--green, white, or green with white polka dots. What do you think?


Thursday, October 7, 2010

Eeny Meeny Miny Mo

Sometimes I wonder if I'm completing my DIY projects too soon. What if I get all them done by Christmas and I have nothing to do from January to June?! Yes, this is a thought that crept into my mind today. I know. Ridiculous.

So I'm on to my next DIY projects. I just need to choose what to do next.


I want to decorate the aisle with pomanders. I was planning on doing moss pomanders, but then I came across these gorgeous crepe paper pomanders (from House of Smiths-- awesome blog!). That pink one would look ah-mazing with a beautiful green ribbon hanger and bow. This project looks like it would take a while too, so that would help with my finishing-my-DIY-projects-too-soon phobia. Hmmm...


I want to make a "Just Married" parasol. I have the parasol. It was free. FI's youngest brother had a big party this summer and some girl left it behind and never retrieved it. Score. So if I royally mess it up I won't be as mad at myself since I'm not financially attached to the parasol. :)


I think I've changed my mind about putting a wreath on the fireplace. Instead, I think I want to put giant moss covered letters (FI and I's initials and an ampersand: C & B) on the mantel.
Related Posts Plugin for WordPress, Blogger...